
Understanding the role of ISO is crucial to getting the most out of your dSLR. If you are unsure of what ISO is or how to determine which ISO setting you should use, this article is for you. When you have finished reading this, you should have a solid understanding of ISO and it’s role in capturing great images.
The term ISO is derived from the International Organization for Standardization, a group that establishes standards for a wide variety of commercial enterprises, including the photographic industry.
ISO describes how sensitive a digital sensor is to light. Unlike film, which requires the entire roll to use the same sensitivity setting, the digital sensor in your dSLR can adjusted for each individual image. This allows you to tailor your sensor to fit both your subject and the lighting conditions.
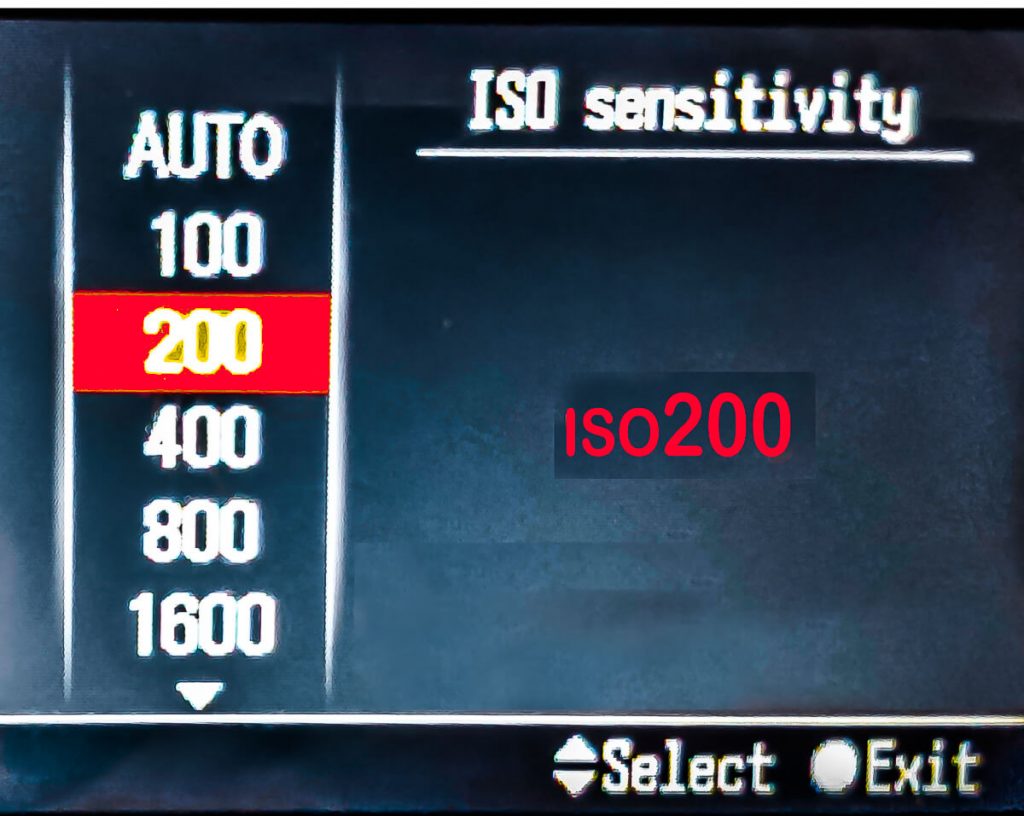
On most dSLRs the lowest sensitivity starts at ISO 100. The ISO doubles each time the sensitivity is increased. Thus the ISO range would be 100, 200, 400, 800 and so on. Early dSLRs usually topped our at ISO 1600. The current crop of dSLRs may feature an ISO of 3200 or even 6400. If your camera features a high ISO of 3200, that means you can adjust your sensor through a range of five stops. Should your camera offer a ISO of 6400, you have a six stop range, assuming a low ISO of 100.
What are the advantages of shooting at a high ISO?
In dim light, you generally want to use a high ISO setting. There are several advantages to adjusting the sensor so it is more sensitive to light.
- It allows you to capture images in dim light
- You can use a faster shutter speed to freeze motion
- By increasing the shutter speed, you can hand-hold long telephoto lenses with less worry of camera vibration
- You can increase depth of field by stopping the lens down to a smaller aperture
Of course, most good things involve a trade off. The advantages of a high ISO setting comes at the expense of image quality. Unfortunately, the higher the ISO, the more visible noise you will see in the final photograph.
The problem of noise
Noise is a pattern of noticeable specs appearing throughout the image. Noise is often compared to film grain, but it is not the same thing, Fast films usually show more grain than slower emulsions, because to increase sensitivity, the individual grains of silver have to be larger. As these silver grains grow, they become more noticeable.
Digital sensors work differently. You can think of the individual pixels of the sensor as miniature solar collectors. To collect more light, the camera’s processor needs to amplify the electrical charge to each pixel. A higher charge creates more heat and digital interference, which translates into noise.
By turning down the power to the sensor, the heat and disturbance can be reduced to a degree that noise is more or less invisible. Thus by lowering the ISO you will typically will see less noise. At ISO 100, images will usually be noise free.
That is only part of the story, however. There are many other reasons to select a lower ISO, beyond noise reduction.
Why would you want to photograph at a lower ISO?
- While fast shutter speeds are great for stopping movement, sometimes you might want to display motion in your photos. Selecting a low ISO will allow you to slow down the shutter and display the appearance of action.
- When you want to use selective focus, you can use a fast lens opened to it’s maximum aperture.This will reduce depth of field to a minimum, allowing you to isolate your subject from the surroundings. To be able to shoot wide open in bright light, you will need to lower the ISO.
- When taking pictures at night, you might want everything but your illuminated subject to look dark. A high ISO can actually cause dimly lighted scenes to look like they were taken in daylight, ruining your efforts at night photography. Reducing the ISO will make your night scenes look like they were actually taken after dark.
Most dSLR cameras will attempt to automatically select the best ISO for a given situation. In most cases, however, manually selecting the ISO will yield superior images. The ISO setting represents a compromise between maximum image quality and maximum light sensitively. These attributes are polar opposites, and your camera cannot determine which attribute should receive priority in a given situation.
Which ISO should you use? For the best image quality, restrict the ISO to 100 or 200. If conditions dictate, you can sacrifice some image quality and turn the ISO up to 400 or possibly 800. You should reserve the highest ISO settings for those times when you are willing to accept a noisy image because it would be difficult or impossible to capture a photo at a lower sensitivity rating.
Full frame cameras usually offer better image quality at High ISO settings
One final thing you should be aware of. Full frame dSLRs will usually offer better image quality at higher sensitivity settings than one with a smaller APS-C sensor. That is because for a given megapixel rating, the individual pixels on a full frame sensor will be larger. larger pixels collect more light, so they will need less amplification to record at a particular ISO setting.
That doesn’t mean that a full frame camera is immune to noise problems, or that a camera with a APS-C sensor cannot produce very high quality images. All things being equal, however, you can crank the ISO up higher on a FF sensor with less fear of producing a noisy image.
Other articles in the Basic Digital Photography series: